Early-Years Science: Cress-Growing
Setup time: ~1/2h
Run time: 1-2 weeks
Age range: 3+
Goals
Investigate what seeds and plants need to grow.
Introduce the basic idea of a controlled trial.
You will need
- cress seeds1 1The cress seeds are the one thing you need for this experiment that you're unlikely to already have at home. But you can buy packets of cress seeds on e.g. Amazon for around £5 including delivery. The seeds keep almost indefinitely. So even if they take a while to be delivered by post at the moment, they should work fine in the experiment once they arrive. Alternatively, you could try the experiment with whatever seeds you can get your hands on. Let me know if you find other types that also work well.
- 4 trays (plastic food trays are perfect - remember to wash them throughly first!)
- 2 cardboard boxes (big enough for the trays to fit in)
- 4 pieces of kitchen roll, or enough cotton wool to line each tray
How to do the experiment
Setting up (about 1/2h)
- If the boxes have any holes in them, cover over the holes by sticking pieces of cardboard or paper over them so the boxes are dark inside when closed.
- Cut a large window in the side of one of the boxes. Leave the other box intact.
- Line the bottom of each tray with a piece of kitchen roll folded to fit, or with a layer of cotton wool.
- Sprinkle a similar number of seeds in each tray. It doesn't matter too much if you use a generous number of seeds or a light sprinkling.2 2More seeds means more cress to eat later! But fewer seeds means you can do the experiment again - I usually manage to get two runs of the whole thing out of one packet of seeds.
Pour water into three of the trays. Don't put any water in the last one.
Use enough water to thoroughly soak the kitchen roll or cotton wool, but not so much that there's a lot of water sloshing around the bottom of the trays. You can always tip out any excess.
Put one of the watered trays inside the box without the window. Put another of the watered tray inside the box with the window. Put both the boxes and the remaining two trays (one watered, one dry) somewhere that gets daylight.3 3Strictly speaking, for a full controlled trial we ought to have one more: a tray in the dark and without any water. It will do exactly the same as the tray without water in daylight: namely, nothing at all! If you want to be more thoroughly scientific about this, and you have enough seeds and boxes, go ahead and add this extra tray. It doesn't need to be direct sunlight. Near a window is good, but anywhere that gets some natural light shoule be fine.
If you put the trays near a window, or anywhere that gets more light from one side than the other, make sure you rotate the trays that are in the open at least once a day for best results.
Observing (a few minutes each day, for about 1 week)
- Each day, take the trays out of the boxes (remember which tray came from which box), and have a look at what's happening to the cress.
- Prompt your children to observe and describe what they see, especially the differences between the cress in the different trays. Encourage them to think about why the seeds are doing what they've seen, and why the cress in different trays is growing differently. See What to talk about for suggestions.
- Water the same 3 trays as before (the two trays from the boxes, and one of the trays in the open). Don't water the last tray (the second tray in the open).
- Put the trays back into the same boxes they came from, and close the boxes.
- Rotate the trays that are in the open, so they get light from all sides.
After about a week, there should be obvious differences between the cress in the different trays. Once you've finished this part of the experiment, you can eat the cress from the tray that had both water and light if you like!
This experiment reliably gives good results if you remember to water the cress regularly. The only time I've seen it fail was during a summer heat-wave, when the cress wasn't watered enough and died.4 4Despite this, the cress had grown enough before it died for me to have an insightful half-hour scientific discussion about trays of dead cress, with a group of very interested 3-4 year-olds! Don't worry if things don't work the first time. Working out what went wrong can be more scientifically interesting and teaches at least as much as the experiment working perfectly first time. Experiments not going as planned is part of the scientific discovery process, and one that's very familiar to all scientists. If the weather's hot, make sure you keep the kitchen roll or cotton wool thoroughly soaked. You might need to water it more than once a day if it's very hot.
What to talk about
Prompt your children to observe what's happening to the cress and think about why that might be happening, by asking questions such as:
- At the beginning, when the seeds are just sprouting
- Is anything happening to the seeds in this tray? (E.g. the one with water in the open.)
- What about the seeds in that tray? (E.g. the one that without water.)
- Why do you think the seeds in the other trays are growing, but the seeds in that one aren't?
- What's different about the tray where the cress isn't growing?
- Why do you think seeds don't grow when they're in the packet?
- How do they know to start growing?
- When the cress has started growing
- What can you see happening in this tray?
- What differences can you see between this tray and that tray? (E.g. the one in the open and the one from the box.)
- Once the cress has grown
- What colour is the cress in the tray in the open? What about the one from the box?
- Can you see any other differences between the cress in the open and the cress from the box?
- Which one is taller and which one is shorter?
- Why do you think the seeds in the box did that?
- What do you think the seeds in the open have, that the seeds inside the box don't have?
- Where do you think the seeds in the dark thought they were?
- What do you notice about the cress in the box with the window?
- Why do you think they did that?
- Extending the experiment (a few minutes each day, for about another week)
- You can extend the experiment by taking the trays out of the boxes and placing them in daylight, and now watering all the trays.
- Each day, have a look at what's happening to the cress now.
After about another week, all the cress should look more like the tray that started out in daylight and with water. (Which you might have eaten already! The rest of the cress should taste nice now, too.)
What to expect
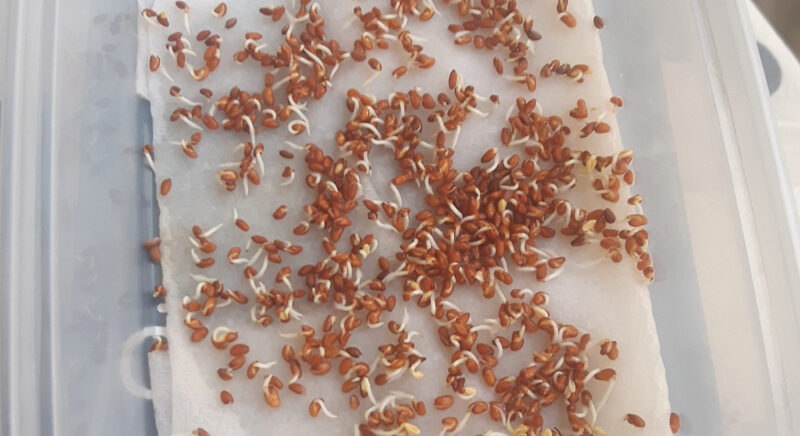
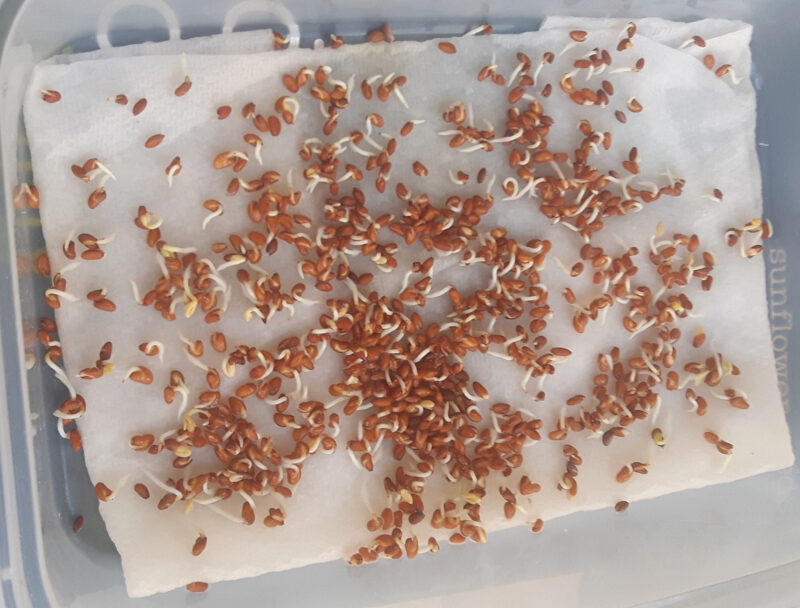
After you've set the experiment up, it will take a couple of days for the seeds in the trays being watered to start sprouting:
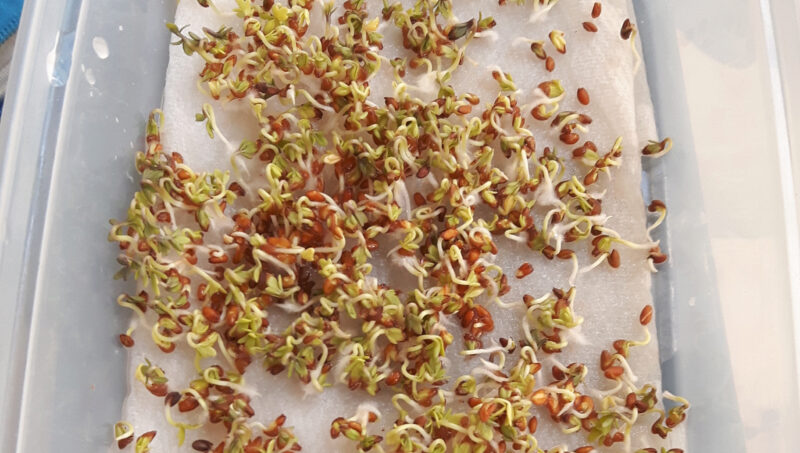
It will take a few more days before you will start to see differences between the cress in the different trays:
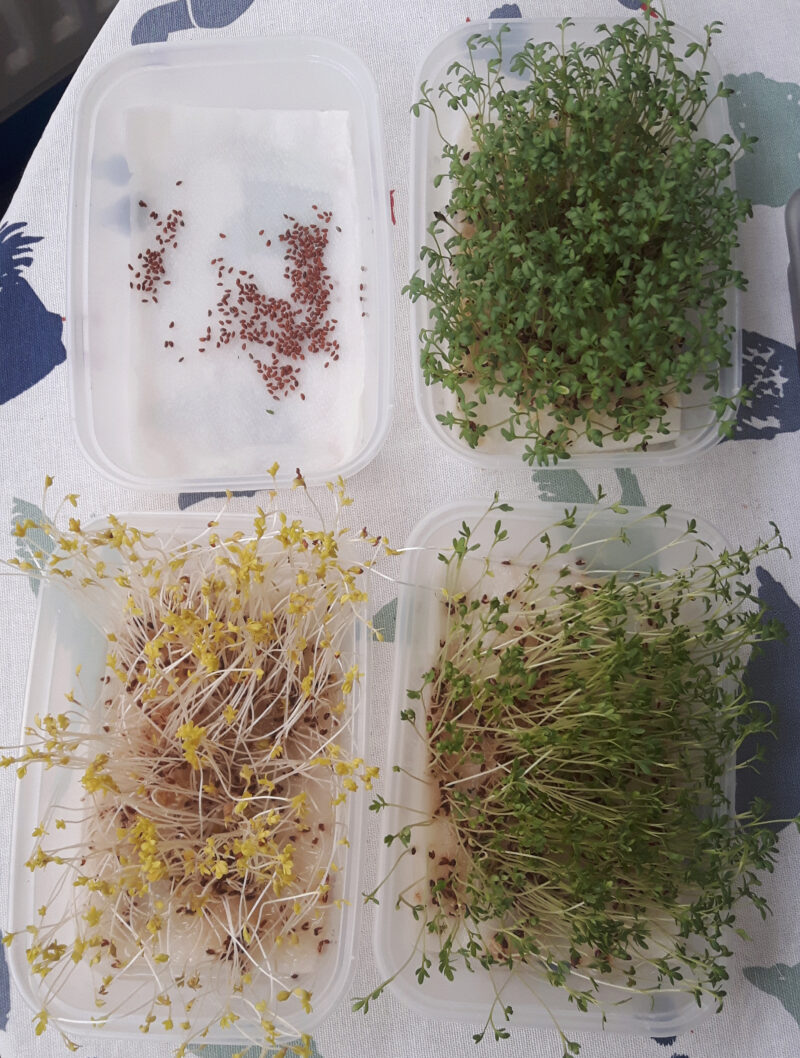
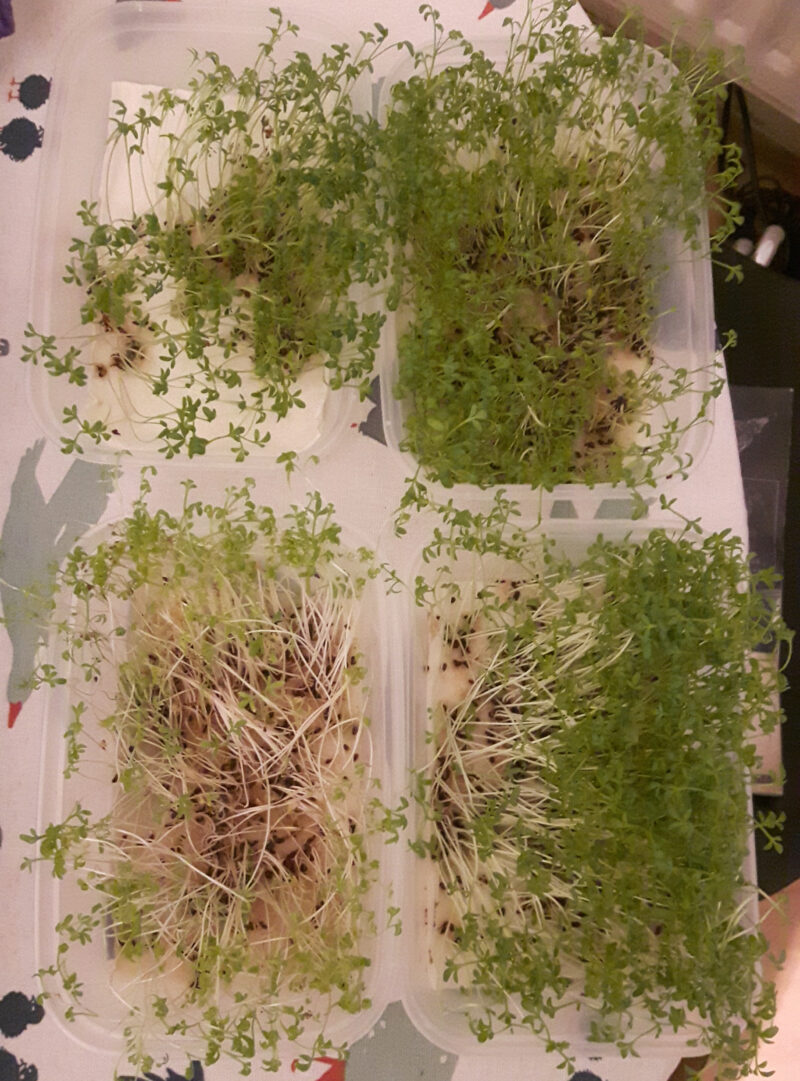
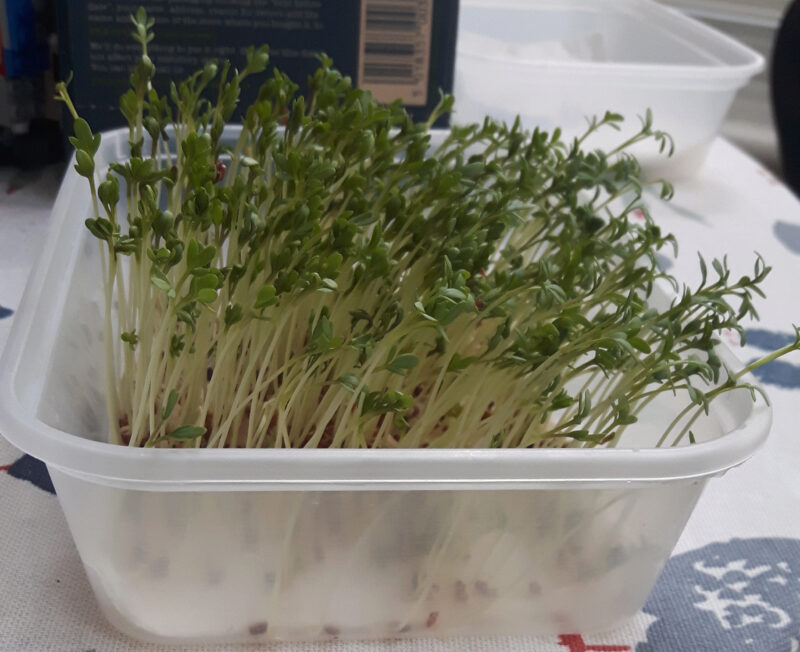
And it will take about a week for the cress to be fully grown, at which point there will be clear differences between the four trays:
After you take all the trays out of the boxes, place them in daylight, and start watering all of them, it will take about another week for all the cress to look more like the tray that started out in daylight and with water:
What's going on
Wet and dry
Like us, plants need water to survive. Because water is so essential to life, seeds won't even germinate (start to grow) without it; they'd quickly die from lack of water if they did. So seed germination is triggered by water:
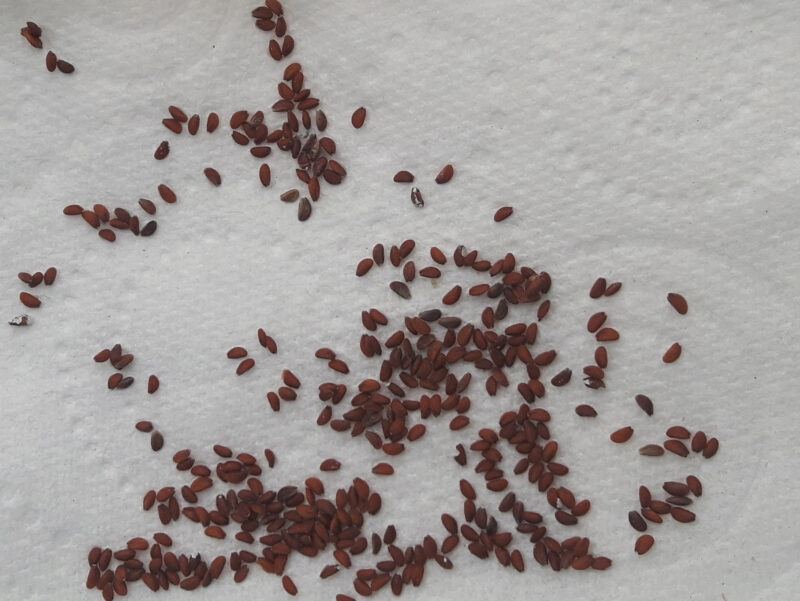
The seeds in the tray that doesn't have any water will just sit there, doing nothing. Just like they did in the packet:
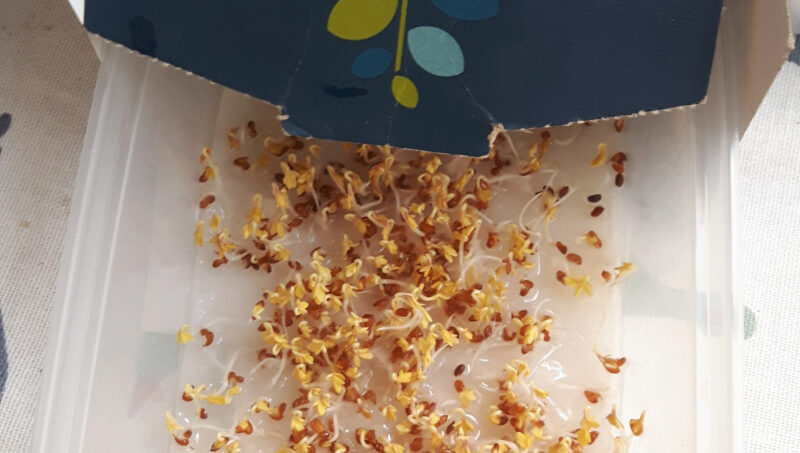
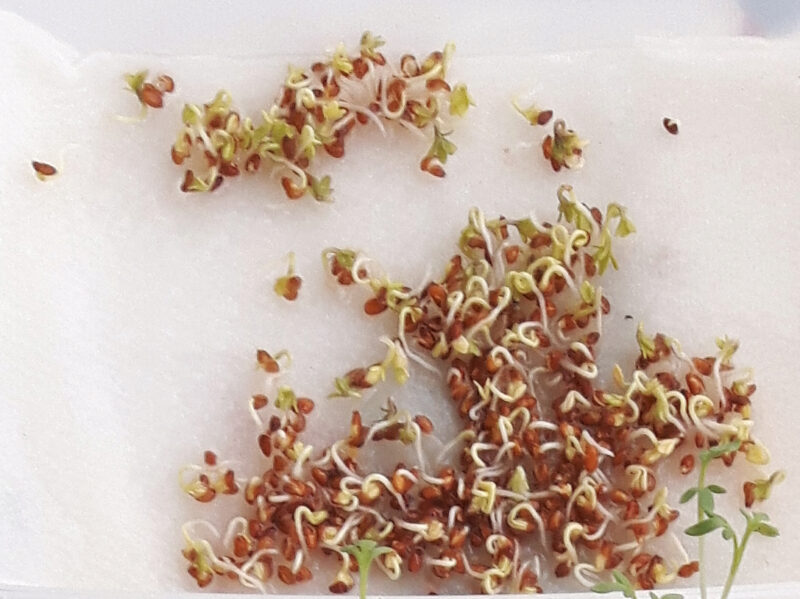
When you give them some water in the second half of the experiment, they start to sprout:
Light and dark
Whereas we need to eat food to get energy to survive, plants get their energy from light. Chlorophyll (the green stuff in plants) uses energy from light to turn carbon dioxide from the air and water the plant gets through its roots, into sugar which the plants then use as an energy source: a process is called photosynthesis. The seeds growing in daylight quickly turn green, as they make clorophyll to start using the light energy to make sugar:
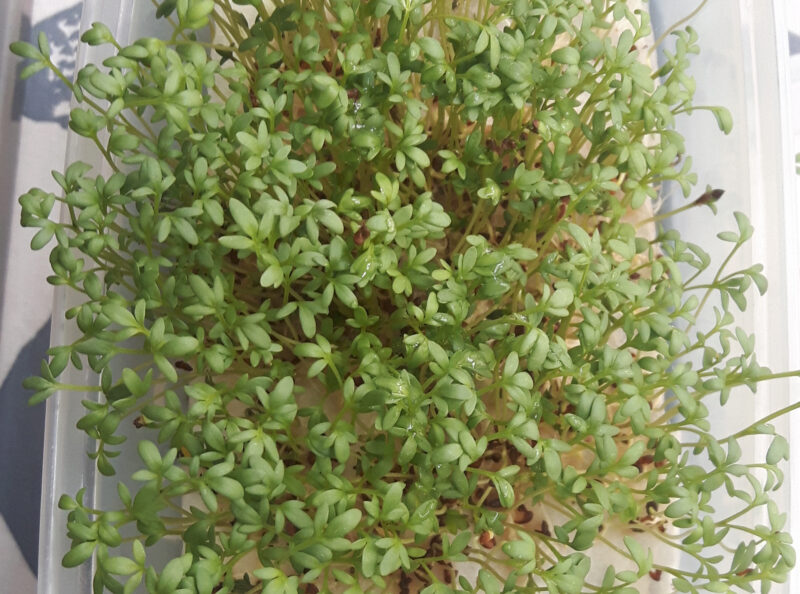
The cress inside the completely closed box isn't getting any light, so clorophyll would be no use to it. It's yellowish-white because it hasn't produced any green clorophyll yet:
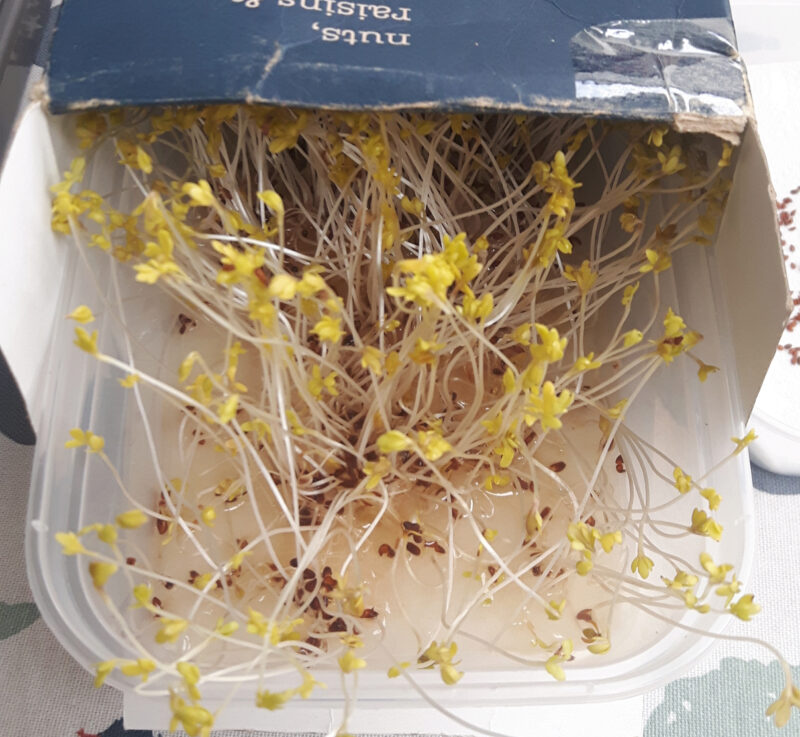
As well as being yellowish-white instead of green, the cress in the dark grows faster and taller than the cress in the daylight, because it's trying to reach daylight as quickly as possible.
Usually, if seeds find themselves in the dark, it's because they're underground. So the first thing they do is grow as fast as possible upwards, until they reach the surface and daylight and start producing clorophyll.
Light from the side
The cress in the box with the window gets plenty of light through the hole we cut in the side of the box. So it grows and turns green like the cress growing in the open:
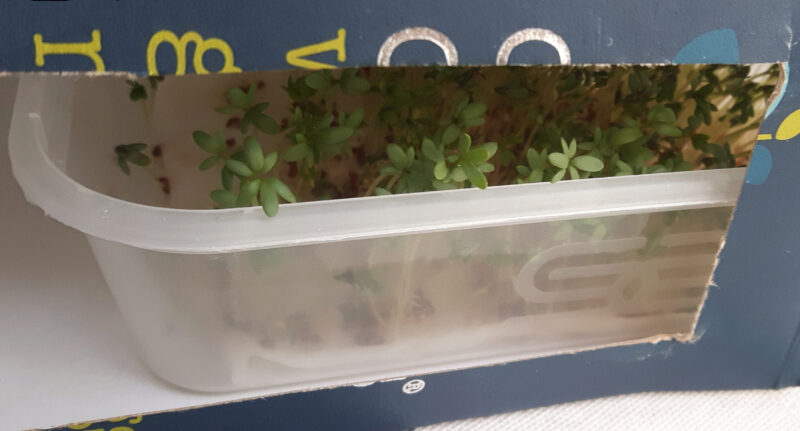
But after a few days, the cress in the box with the window will be noticably bent over towards the side of the box with the window, where the light is coming from:
The cress is trying to get as much light as possible, so it can generate plenty of energy by photosynthesis. So it grows towards the light, and bends towards the window. Whereas (if you remember to rotate it regularly!), the cress growing in the open is getting light from all sides, so there's no reason for it to bend one way or the other, and it grows straight:

Thinking like a scientist
Observing, then asking "why?"
It doesn't matter whether it's about discovering what seeds need to grow, or about discovering the Higgs boson: science starts with noticing something interesting, then asking "why?"5 5Which young children often excel at! Learning what plants need to grow is interesting. But learning to carefully observe what's happening, learning to then go onto think about why it happened and try come up with some explanation, is far more important. These are key skills of any scientist. Science isn't a collection of facts; it's a way of asking questions that leads to new facts and new discoveries.
It's more important to encourage your children to look carefully and tell you what they notice about the cress for themselves, than to get them to spot the "right" things. They may need some help and guidance to notice some things. But helping and encouraging them to spot things for themselves, rather than pointing it out to them, encourages an interest in observing things around them.
Young children will likely need a little more help in thinking about why the cress did what it did. But again, encourage them to think about it for themselves, rather than just explaining what's going on. Children are creative, and directing that creativity towards trying to come up with explanations of things they observe, however wrong or fanciful or "non-scientific", is a more significant step towards thinking like a scientst than learning why cress grows faster in the dark.
Controlled trials
If we're trying to work out what things plants need to grow, it's no good just planting seeds, watering them, giving them daylight, and seeing them grow. It could be they need water and light to grow. Or it could be they just need water. Or just light. Or maybe they don't actually need either. If you'd planted them in soil, you might think they needed soil to grow. And how do you know the crucial thing wasn't the water or the daylight, but the fact that you happened to plant them in a blue flowerpot?
To tease apart which factors are important, and what effect each one has, we need to test them one at a time. By comparing the two trays in daylight, one with water and one without, keeping everything else the same, we can see what effect water has on the seeds. By comparing the tray in the closed box (which we watered) with the tray in the daylight which also got water, we can see what effect light has on the seeds, all else being equal. By comparing the tray in the box with a window cut out, with the tray in the open which we rotated regularly to make sure it got light from all sides, we can see whether the direction the light is coming from has any effect.
Wherever possible, scientific experiments need a control group: one (or more) other runs of the same experiment changing just one factor at a time, to see if that particular factor made any difference, and exactly what difference it made.
The idea of a controlled trial may be too complex to explain to young children directly. But seeing it in action is a good way of introducing the idea from early on. Encourage your children to compare two trays of cress at a time, and spot the differences between them. Then get them to remember what you did differently to the two trays when you first set them up, and each day after that. Finally, encourange them to think about what effect that difference might have had, and discuss with them their ideas for why it might have had that effect. This already gets across the idea of comparing one factor at a time (water, light, and light direction in this experiment), and working out what effect each individual factor has, separately from the other factors.
Variations
- Add an additional tray in the fridge I sometimes add another tray of cress, with water but putting it in the fridge. Like the tray inside the box, it doesn't get any light. But the cold slows the growth significantly. So, unlike the cress in the box which grows quickly, the cress in the fridge barely grows at all.
- Other types of seeds Cress is a good choice, because it's very easy to grow and makes this experiment very reliable. But it would be interesting to know if it works well with other types of seed, too.
- Other ideas? Let me know!
Feedback
If you try this experiment with your own children, I'd be very happy to hear feedback on what worked well, what didn't work well, whether it was easy to follow, whether the explanations were clear, or anything else. I will continue to edit and improve this page over time. You can post public feedback on this page using the form below, or send me an email.
Leave a comment
All comments are moderated. Clicking submit will open your email client and let you send your comment by email. By submitting your comment you agree to license the content under a Creative Commons Attribution-ShareAlike 4.0 International License.